Introduction to Metal Roses – Crafting Beauty from Metal
Metal roses represent a stunning fusion of industrial materials and natural beauty, transforming cold, hard metal into an elegant, everlasting flower. Unlike their organic counterparts, these steel blossoms never wilt or fade. This makes them perfect as lasting gifts or unique home decorations. They are sculptures fabricated from metal, capturing the delicate curves and layered petals of a real rose in durable materials.
The art of crafting metal roses marries traditional blacksmithing techniques with modern metalworking approaches. Both beginners and experienced crafters can create something truly special.
The beauty of this craft lies in its versatility—you can create rustic or polished sculptures depending on your finishing techniques. This comprehensive guide details every step, from initial design and cutting to shaping and final assembly. Whether you’re making a single heartfelt gift or multiple pieces for display, you’ll find everything you need here.
Essential Materials for Making a Metal Rose
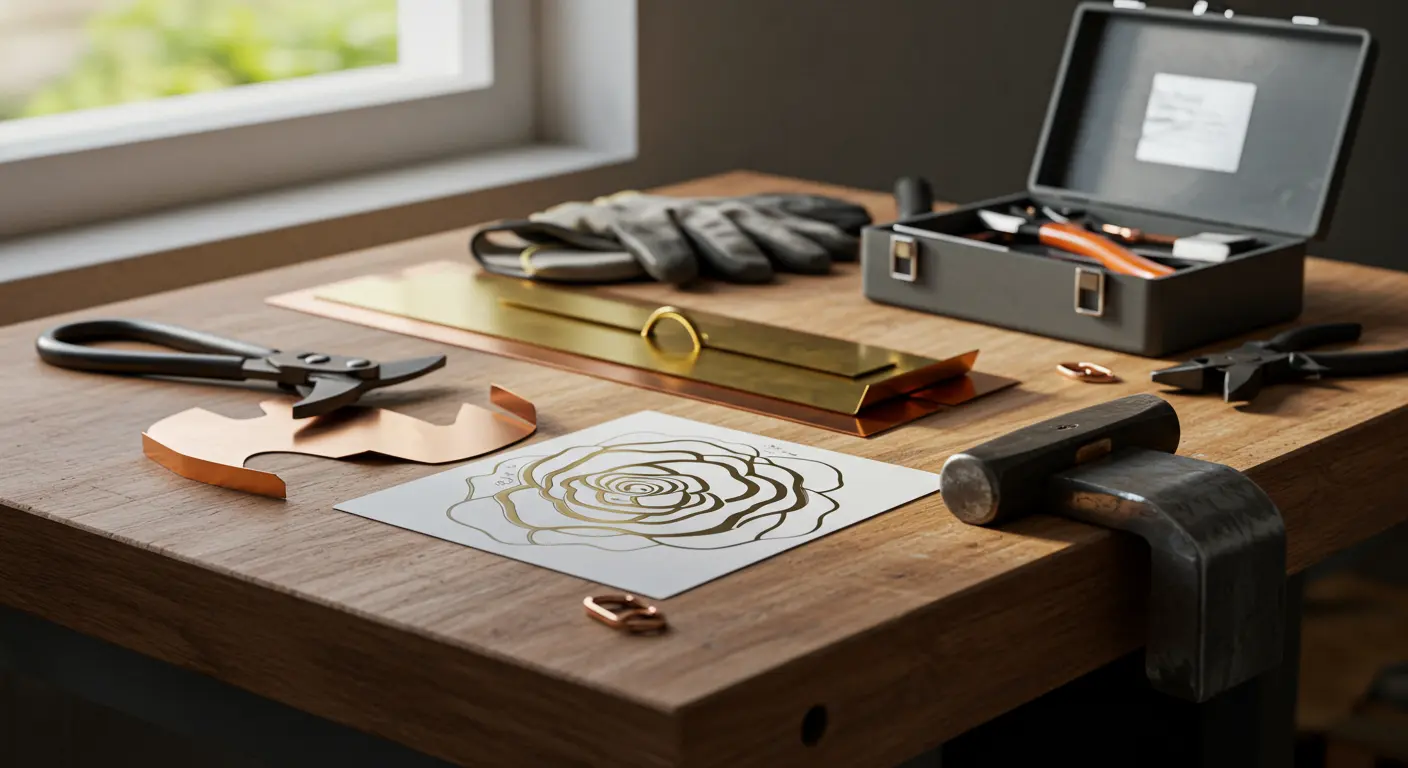
Having the right materials and tools is essential for success. For the rose itself, you’ll need sheet metal—popular choices include brass, copper, or steel, each offering different aesthetic qualities and working properties. Brass and copper are softer and easier to work with. Steel provides greater durability. Choose sheet metal between 26-30 gauge thickness—this allows easier manipulation while maintaining structural integrity.
For the stem, you’ll need a metal rod or wire sturdy enough to support your finished rose. Steel wire between 12-16 gauge works well for most projects. Thicker wire may be necessary for larger roses.
Essential tools for this project include:
• Metal shears or tin snips for cutting the petal shapes from your sheet metal
• Pliers (both needle-nose and round-nose) for bending and shaping the petals
• A ball-peen hammer and anvil or hard surface for texturing and forming the metal
• A drill with small bits for creating assembly holes
• Files for smoothing rough edges
• Wire cutters for trimming the stem
Safety equipment is absolutely essential when working with metal. You’ll need:
• Cut-resistant gloves to protect your hands from sharp edges
• Safety glasses to shield your eyes from metal fragments
• A dust mask if grinding or sanding
Additional helpful items include:
-
A template for your petal design
-
Epoxy or superglue for assembly
-
Sandpaper or a grinder for finishing
-
Metal paints or patina solutions to add color
Step 1: Designing Your Metal Rose Template
A well-designed template forms the foundation of a beautiful metal rose. Your template will guide the cutting process and determine the final appearance of your flower. You can either design your own template or find existing patterns online that match your vision.
When designing your template, consider the following elements:
• Petal shapes: Create at least three different petal sizes—smaller for the center, larger for the outside—to achieve a natural look. A typical rose has 5-7 inner petals and 15-20 outer ones.
• Leaf patterns: Design a few leaf shapes if you want to include foliage with your rose. Rose leaves typically have serrated edges and come in groups of three or five leaflets.
• Assembly tabs: Include small tabs at the base of each petal that can be folded to attach the petal to the stem. These tabs are crucial for proper assembly.
Draw your template on paper first, then transfer it to a durable material like cardboard or plastic. Precise measurements are essential—use a ruler and compass for symmetry. Petals typically range from 1–3 inches long, depending on your desired rose size.
If you’re using software to design your template, programs like Adobe Illustrator or even free alternatives like Inkscape allow for precise measurements and easy adjustments. Print your template on card stock for tracing onto the metal.
Test your template by cutting and assembling it from paper first. This preview helps catch design problems early, saving both time and materials.
Step 2: Cutting the Metal Pieces
With your template prepared, it’s time to transfer your design to the metal and begin cutting. This step demands precision and patience. Ensure your petals and leaves will fit together properly during assembly.
Start by placing your template on the sheet metal and securing it with tape or magnets to prevent shifting. Use a fine-point permanent marker or metal scribe to trace the outline of each petal and leaf onto the metal surface. Mark clearly where any tabs or fold lines should be.
When cutting the metal, you have several options depending on the tools available:
• Metal shears or tin snips are the most accessible tools for beginners. Choose compound snips with offset handles to keep your hands away from sharp edges. For curved cuts, aviation snips work best.
• For more precise cuts, especially with thicker metal, a jeweler’s saw or scroll saw with a metal-cutting blade provides greater control.
• If available, a plasma cutter or metal cutting wheel on a rotary tool can make quick work of cutting out multiple pieces.
Work slowly, cutting along the outside of your traced lines. For interior cuts, drill a starter hole first. Always cut slightly outside the line—you can file down excess material later.
After cutting, debut all edges with a metal file or sandpaper. This step prevents injuries. It also ensures clean folds when shaping.
Organize your cut pieces by size and type (petals vs. leaves) to streamline the assembly process later. Count your pieces against your design plan to ensure you have cut all necessary components before moving to the shaping stage.
Step 3: Shaping the Petals and Leaves
Transforming flat metal pieces into lifelike rose petals requires careful shaping techniques that mimic the natural curves and contours of real flowers. This is where your metal rose truly begins to take form and develop character.
Begin with the petals, working from the inside out:
For the innermost petals (the bud):
1. Take your smallest petal pieces and place them on a soft surface like leather or a rubber mat.
2. Using the ball end of a ball-peen hammer, gently tap the center of each petal to create a slight dome shape.
3. Use round-nose pliers to curl the top edges inward, creating a tight, bud-like appearance.
For the middle and outer petals:
1. Place each petal on your work surface and use the ball-peen hammer to create a gentle concave curve in the center.
2. For more realistic texture, lightly hammer the entire surface with the ball end to create subtle dimpling that catches light.
3. Using your fingers and pliers, roll the edges of the petals outward and downward to create natural-looking curves. The outer petals should have more pronounced curves than the middle ones.
For leaves:
1. Create a central vein by pressing a straight metal rod or screwdriver along the center of each leaf.
2. Use pliers to bend the leaf slightly along this central vein, giving it a natural curve.
3. Add texture by gently hammering the surface with the peen end of your hammer.
Frequently compare your shaped pieces to reference images to create natural variation—no two real petals are identical. Ensure the curvature increases from the inner to the outer petals.
Take your time with this step. How you shape your petals will dramatically affect your metal rose’s final appearance. If you make a mistake, you can usually reshape the metal, but be careful not to overwork it. This can cause the metal to become brittle or crack.
Step 4: Assembling the Metal Rose
Assembly is where your collection of shaped metal pieces transforms into a cohesive rose sculpture. This process requires attention to detail and patience to achieve a natural-looking arrangement of petals around the stem.
Begin by preparing your stem:
-
Cut your metal wire or rod to the desired length, typically 8–12 inches for a single rose.
-
If using wire, you may want to bend the top portion flat (about 1–2 inches) to create a wider surface for attaching the first petals.
3. For a more finished look, consider wrapping the stem with floral tape or thin gauge wire to simulate a real rose stem.
Next, assemble the rose from the center outward:
1. Start with the smallest petals that form the bud. If you’ve included tabs on your petal pieces, fold these tabs around the flattened top of your stem. Secure with a small amount of epoxy or by spot welding if you have the equipment.
2. For petals without tabs, you can drill small holes near the base of each petal and thread wire through to attach them to the stem.
3. Position the first few petals tightly together to form a closed bud at the center of your rose.
4. Continue adding petals in concentric circles, gradually spacing them further apart and angling them more outward as you move toward the outer layers.
5. Secure each layer before adding the next, allowing adhesive to dry if using glue.
6. The outermost petals should be positioned at a nearly horizontal angle to create the fully bloomed appearance of a rose.
If including leaves:
1. Attach leaves to the lower portion of the stem after completing the flower head.
2. Leaves can be attached by wrapping their tabs around the stem or using small amounts of adhesive.
3. Position leaves at different heights and angles for a natural look.
Throughout the assembly process, periodically view your rose from different angles. Ensure the petals are arranged symmetrically and realistically. Make adjustments as needed by gently bending petals into position.
For a more secure assembly on larger roses, drilling connection points between petals and the stem provides greater structural integrity than adhesives alone.
Remember to bend down any sharp edges as you go to prevent cuts during handling. The final assembly should feel sturdy, with all petals securely attached to create a cohesive sculpture.
Step 5: Final Touches and Finishing
The finishing stage is where your metal rose truly comes to life. Your creation transforms from raw metal construction into polished artwork. This step allows you to add your personal touch and determine the final aesthetic of your creation.
Begin with structural refinements:
1. Carefully examine your assembled rose for any loose petals or connections and secure them as needed.
2. Make final adjustments to petal positions, ensuring they create a natural, flowing appearance from all angles.
3. Check for and file down any remaining sharp edges that could cause injury.
Surface preparation and cleaning:
1. Use fine-grit sandpaper or steel wool to smooth any rough areas and create a consistent surface texture.
2. Clean the entire piece thoroughly with metal cleaner or a solution of vinegar and salt to remove fingerprints, oils, and oxidation.
3. For copper or brass roses, you may choose to polish to a high shine using metal polish, or allow a natural patina to develop over time.
Applying protective finishes:
1. For a natural metal look with protection, apply a clear coat such as lacquer, polyurethane, or specialized metal sealant. This prevents tarnishing and preserves the appearance.
2. If you prefer a colored finish, consider metal paints, powder coating, or patina solutions that react with the metal to create unique colors.
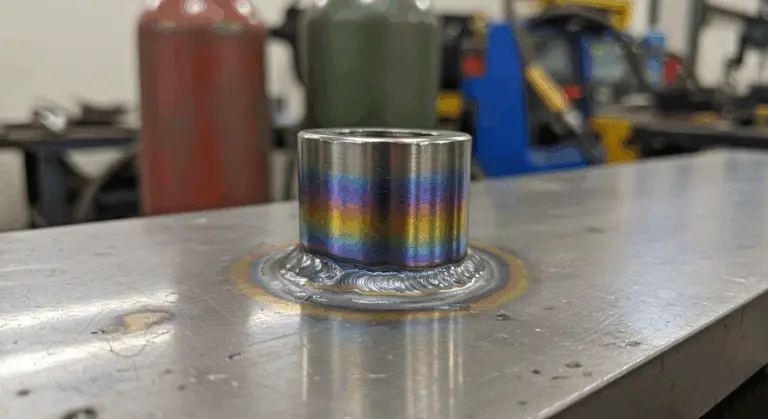
3. For a truly distinctive look, heat treatments can create rainbow effects on certain metals, producing blues, purples, and golds depending on the temperature and metal type.
Creating a display:
1. Consider mounting your rose on a decorative base made of wood, stone, or complementary metal.
2. For multiple roses, arrange them in a metal vase or create a wall-mounted display.
3. Add a personalized tag or engraving if giving as a gift.
Your finishing choices determine the final aesthetic—from a rustic, industrial appearance to a refined, elegant look. Some artists leave slight hammer marks as evidence of handcrafting. Others aim for perfectly smooth surfaces.
Different metals age in unique ways, which can enhance your rose’s character or be prevented with a sealant:
-
Steel: Can rust if not properly sealed.
-
Copper: Develops a green patina over time.
-
Brass: Darkens to a rich golden brown.
Tips for Beginners in Metalworking
Embarking on metal rose crafting as a beginner can be both exciting and intimidating. These practical tips will help you navigate common challenges and develop your skills more effectively.
Safety First:
• Always wear appropriate safety gear, including cut-resistant gloves, safety glasses, and closed-toe shoes.
• Work in a well-ventilated area, especially when applying finishes or heating metal.
• Keep a first aid kit nearby and know how to treat minor cuts and burns.
• Secure your workpiece properly before cutting or hammering to prevent accidents.
Technique Development:
• Practice proper body positioning and hand movement for consistent results. Maintain a stable stance. Hold tools firmly but not tensely.
• Start with thinner, more forgiving metals like copper or brass before attempting steel projects.
• Practice basic techniques on scrap metal before working on your actual project pieces.
• Listen to the sounds your tools make against the metal—experienced metalworkers can often identify proper technique by ear.
Tool Management:
• Invest in quality basic tools rather than purchasing many inexpensive ones. A good pair of metal shears and quality pliers will serve you better than a complete set of low-grade tools.
• Keep cutting tools sharp—dull tools require more force and increase the risk of accidents.
• Create a dedicated workspace with good lighting and a solid work surface.
Material Selection:
• Begin with 28-30 gauge sheet metal, which is easier to cut and shape by hand.
• Consider using copper for your first projects, as it’s softer and more forgiving than steel.
• Clean your metal thoroughly before working with it – oils and residues can affect adhesion and finishing.
Skill Building:
• Master one technique at a time rather than attempting complex projects immediately.
• Consider taking a basic metalworking class at a local community college or maker space.
• Join online forums or social media groups dedicated to metalworking to learn from others’ experiences.
• Document your process and results to track your improvement over time.
Problem-Solving:
• If metal becomes work-hardened and difficult to shape, gently heating it can restore malleability.
• When cutting intricate shapes, start with the interior cuts before cutting the outer perimeter.
• If petals crack during shaping, you may be working the metal too aggressively—use more gentle, progressive shaping.
• Consult with experienced metalworkers when facing challenges—most are happy to share their knowledge.
Metalworking is a craft that improves with practice. Your first rose may not be perfect, but each project builds skill and confidence. Many professionals develop their unique styles through trial and error.