Understanding TIG Welding – The Basics
TIG welding, or Tungsten Inert Gas welding, ranks among the most precise and versatile welding processes available today. At its core, this technique employs a tungsten electrode housed within a hand-held torch, generating the precise heat necessary to melt and join metals. TIG’s defining characteristic is exceptional control. This allows welders to craft clean, strong, and visually stunning welds across an impressive range of materials.
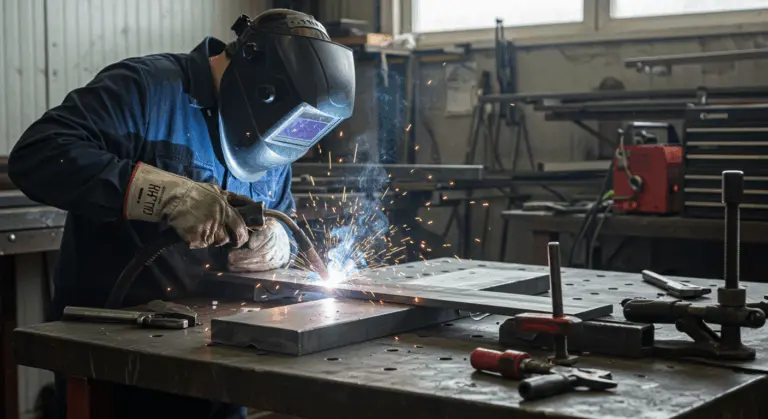
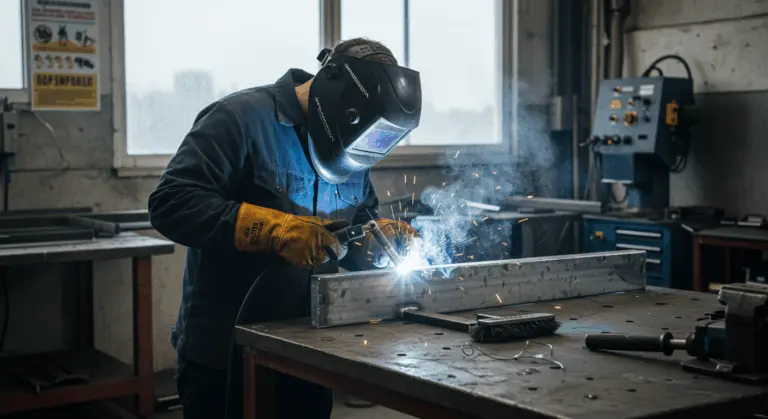
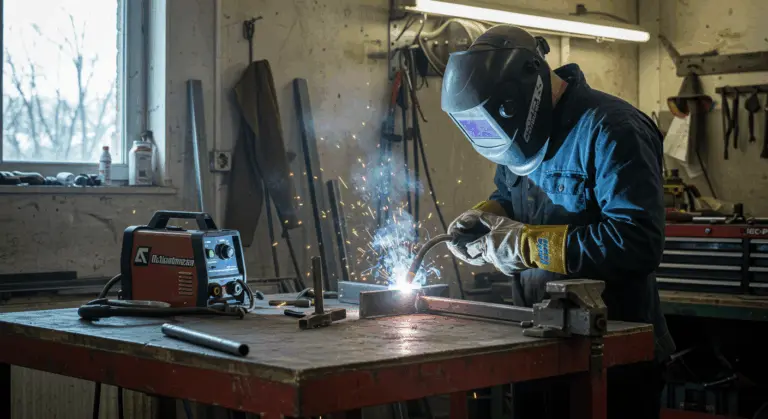
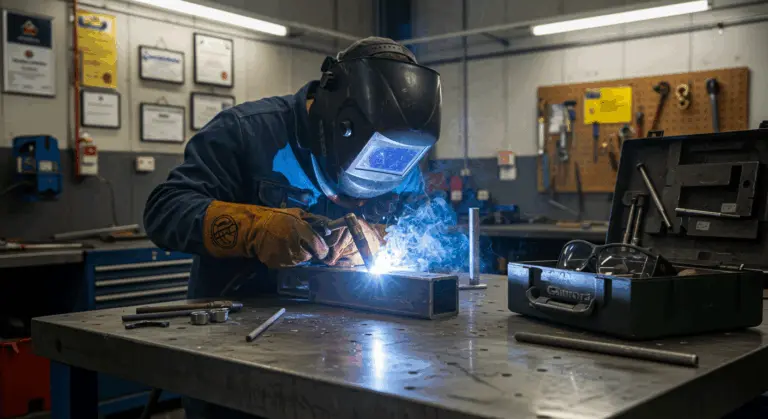
TIG welding’s defining challenge is its unforgiving demand for precision and meticulous attention to detail. The process requires steady hands, sharp eye-hand coordination, and an intimate understanding of how different metals respond to heat. Picture this: during TIG welding, the welder manually feeds a filler rod with one hand while controlling the torch with the other. It’s a coordinated dance that, when executed flawlessly, results in a perfect bead.
The quality of a TIG weld depends on avoiding common pitfalls—porosity (those troublesome gas bubbles), inadequate gas coverage, cracking, and incomplete fusion. Learn these fundamentals, and your welds will be both professional and structurally sound. Yes, TIG welding presents a steeper learning curve. But the ability to produce durable, aesthetically pleasing welds? That makes the investment worthwhile for serious fabricators and hobbyists alike.
Essential Equipment for TIG Welding
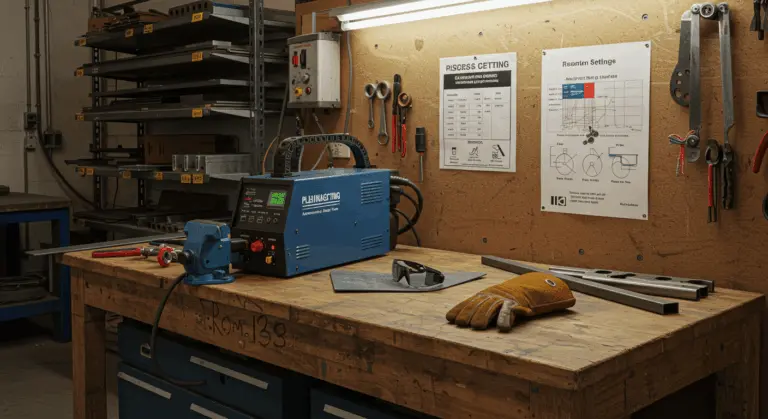
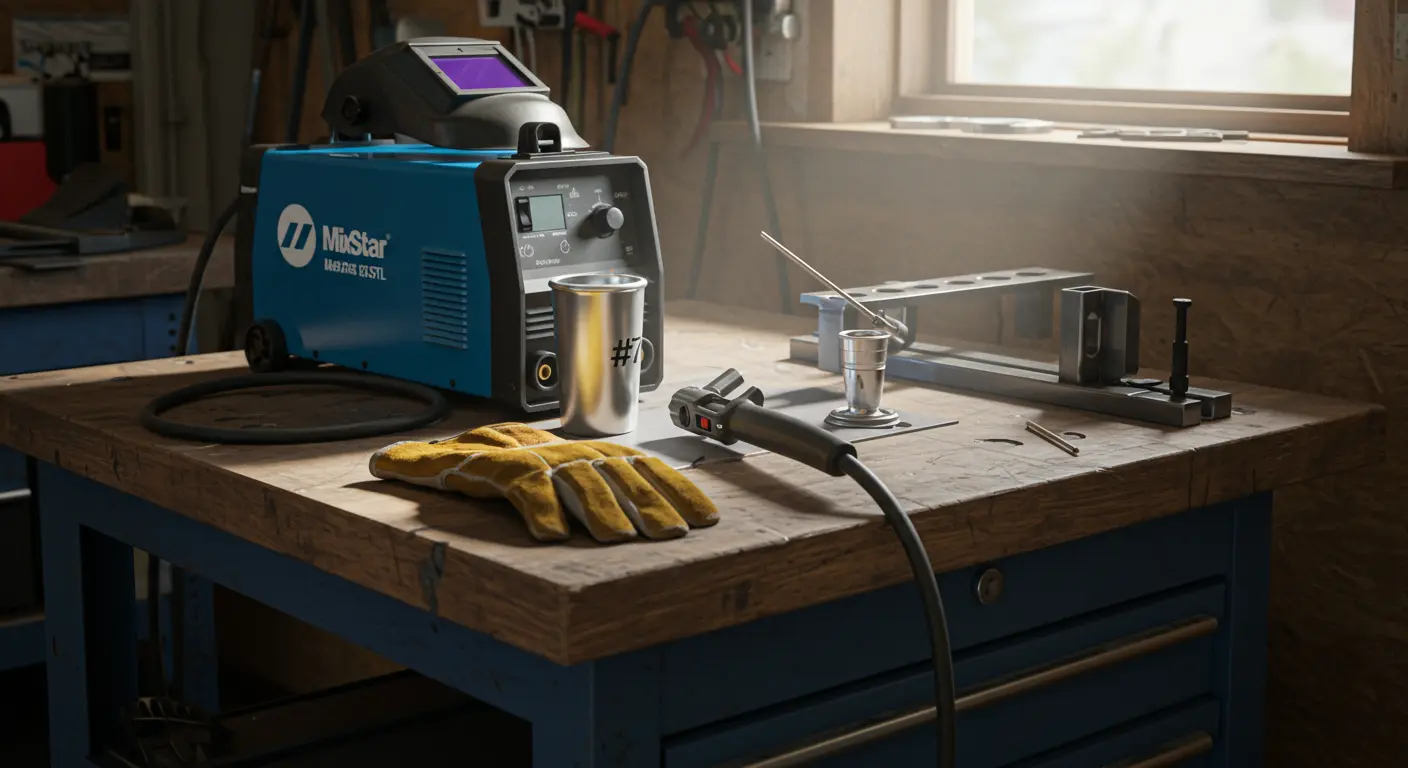
Assembling the right equipment is essential for successful TIG welding. At the heart of your setup should be a quality TIG welding machine—models like the Miller Max star 150 STL deliver excellent performance for both beginners and intermediate welders. Your machine should feature AC/DC capability if you plan to tackle aluminum alongside steel or stainless steel.
Beyond the welder, your setup requires several key components and consumables:
-
TIG Torch: A standard torch with a #7 cup and screen offers good gas coverage and visibility.
-
Tungsten & Preparation: A tungsten facer for precise electrode shaping, along with various electrode sizes (commonly 1/16” and 3/32”).
-
Shielding Gas: Pure argon with a reliable regulator. A purge setup may be needed for specialized jobs.
-
Filler Rods: A selection of rods appropriate for your base materials.
-
Cleaning Supplies: Dedicated stainless steel brushes, abrasive discs, and Scotch-Irish pads for surface preparation.
Personal protective equipment (PPE) cannot be overlooked. While TIG welding produces minimal spatter, the intense UV radiation and heat demand full protection. Essential gear—including a proper helmet, gloves, and flame-resistant clothing—is covered comprehensively in the dedicated safety section.
Setting Up for TIG Welding – Key Considerations
Proper setup is the foundation of successful TIG welding. Begin by connecting your machine’s leads correctly—torch lead to the negative terminal for DEN (Direct Current Electrode Negative) when welding most metals, and the ground clamp to the positive. For aluminum welding using AC (Alternating Current), the polarity switches automatically during the cycle.
Assemble your TIG torch carefully, ensuring all components are spotless and properly seated. The tungsten electrode should extend beyond the collet by approximately 1/8 to 1/4 inch, depending on your specific application. When using a gas lens, you can extend the tungsten slightly further for enhanced visibility and access to tight joints. Secure your shielding gas connection and set your flow rate between 15-20 CFH (cubic feet per hour) for most applications. Higher for larger cup sizes or outdoor welding, lower for smaller jobs.
Next, set up your welder’s functions. For beginners, start with straightforward settings: set your amperage based on material thickness (roughly 1 amp per 0.001″ of material). If your machine offers pulse or advanced features, leave these off until you’ve mastered the basics. Attach your ground clamp securely to the workpiece or welding table, ensuring excellent electrical contact by cleaning the connection point.
Before starting your project, practice on scrap metal of identical type and thickness to fine-tune your technique and settings. Start with moderate amperage to develop a feel for puddle control. Also, ensure your body position is comfortable—sustained precision becomes nearly impossible if you’re straining.
Mastering TIG Welding Techniques
TIG welding requires more skill and coordination than other welding processes like MIG or stick welding. The fundamental technique involves maintaining consistent arc length while simultaneously controlling the torch in one hand and feeding filler rod with the other. Begin by establishing your arc, typically holding the tungsten 1/8 to 1/4 inch from the workpiece. Create a molten puddle. Then introduce your filler material.
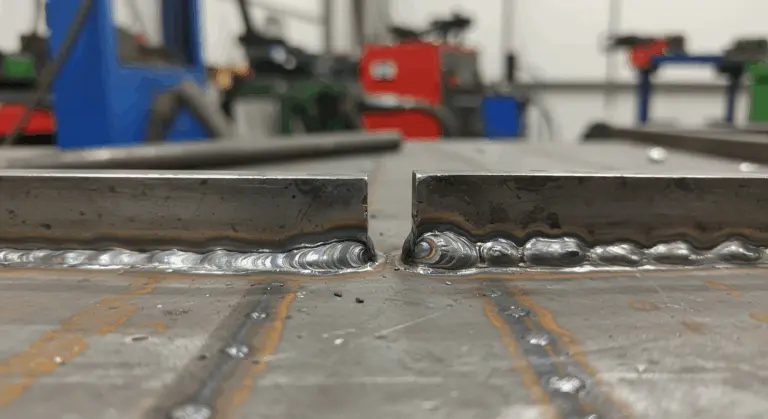
The secret to improvement is Reading the weld puddle in real-time, as it serves as your ultimate guide. Watch for its fluidity, color, and edge definition to understand when to add filler, when to pause or adjust travel speed, and how to modify your heat input. A properly controlled puddle should appear bright and well-defined, with smooth transitions to the base metal.
Practice maintaining consistent travel speed—moving too quickly results in inadequate penetration, while moving too slowly can cause excessive heat input and potential burn-through. Your torch angle typically should hover around 15–20 degrees from vertical in the direction of travel, though this may vary based on joint configuration. When adding filler rod, approach the leading edge of the puddle at approximately a 15-degree angle, dipping in and out with rhythmic precision.
Advanced techniques like “walking the cup” involve resting the ceramic cup on the workpiece and rocking it forward in small increments, creating extremely consistent beads. This technique works especially well for pipe welding and other applications requiring precise, uniform welds. With patience and persistent practice, you’ll develop the muscle memory and puddle recognition skills that transform challenging TIG welds into satisfying accomplishments. This enables high-quality fabrication work that other welding processes simply cannot match.
Common Challenges in TIG Welding and Solutions
A common challenge is porosity—gas bubbles in the weld—typically caused by contamination or poor gas coverage. To prevent it: thoroughly clean the base metal (using dedicated brushes or acetone), ensure proper gas flow (15-20 CFH) and check for line leaks, and use adequate post-flow time to shield the weld as it cools.
Inconsistent penetration also causes problems. Here’s how to fix it: for inadequate penetration, increase amperage, slow your travel speed, or improve joint preparation. For burn-through, reduce amperage or increase travel speed. For thin materials, use a foot pedal for precise, real-time amperage control.
Controlling the weld bead appearance can frustrate beginners. Uneven bead width or height often stems from inconsistent hand movement or improper filler addition. Practice maintaining a steady rhythm when adding filler rod, and focus on keeping your torch hand movement smooth and controlled. Using a forearm rest or stabilizing your hand against the workpiece can dramatically improve steadiness.
Geometric challenges also arise frequently in TIG welding. Accessing tight corners or maintaining proper torch angle in confined spaces requires practice and sometimes specialized equipment like smaller cups or flexible torch heads. For complex joints, proper fixturing or tack welding before full welding can prevent alignment issues. When working with dissimilar thicknesses, direct more heat toward the thicker piece while being careful not to overheat the thinner material. Working through these common challenges, you’ll develop the problem-solving skills that distinguish accomplished TIG welders from novices.
Safety First – Protecting Yourself While Welding
TIG welding safety starts with proper eye and face protection. The arc produced during TIG welding emits intense ultraviolet and infrared radiation that can cause severe eye damage. Invest in a quality auto-darkening helmet with a shade rating of at least #11 for most TIG applications, ensuring it can detect and respond to the lower amperage arcs typical in TIG welding. Under your helmet, wear safety glasses as secondary protection—particularly when chipping slag or grinding.
Protecting your skin matters just as much. TIG welding may produce fewer sparks than other processes, but the heat and radiation remain hazardous. Wear flame-resistant clothing that covers all exposed skin—a proper welding jacket, preferably leather for heavy-duty applications or flame-resistant cotton for lighter work. Complete your outfit with leather gloves (goatskin offers the best dexterity for TIG), leather boots, and flame-resistant pants. For overhead welding, which produces more falling hot metal, consider additional protection like a leather cap or bandana under your helmet.
Respiratory protection is important. While TIG welding produces fewer fumes than other processes, it still generates potentially harmful vapors—especially when working with stainless steel, galvanized materials, or metals with coatings. Ensure your workspace has adequate ventilation, preferably with local exhaust ventilation that captures fumes at the source. For additional protection, wear an appropriate respirator rated for welding fumes.
Prepare your work environment carefully to ensure safety: remove all flammable materials from the area, keep a suitable fire extinguisher within easy reach, organize the workspace to prevent trips and falls, and inspect all cables for damage. Avoid wet conditions and ensure proper electrical grounding. Making safety your priority ensures a long and healthy welding career.
Next Steps in Your TIG Welding Journey
After learning the basics, expand your skills with more challenging projects. Progress from simple butt joints to lap, T-, and corner joints. After conquering mild steel, practice with other materials like stainless steel, aluminum, and eventually titanium or copper alloys.
A significant advancement is refining your heat control using a foot pedal or fingertip control for real-time amperage adjustments. This skill becomes important for varying material thicknesses and for welding in challenging positions—vertical, overhead, and other out-of-position orientations. These positions demand superior puddle control and technique.
Consider pursuing formal education to learn faster. Many community colleges and technical schools offer welding courses specifically focused on TIG techniques. These structured learning environments provide expert feedback that can help identify and correct subtle issues in your technique. Online resources, including video tutorials from master welders, can supplement your hands-on practice with valuable insights and demonstrations of advanced techniques.
For those considering welding as a career path, industry certifications validate your skills and create professional opportunities. Organizations like the American Welding Society (AWS) offer certifications recognized throughout the industry. Whether your goal is professional advancement or personal satisfaction in creating high-quality fabrications, continuing to challenge yourself with new techniques, materials, and projects will ensure your TIG welding journey remains both rewarding and progressive.